Tiger Woods at The Open, Round 4
5 Min Read
Written by Staff
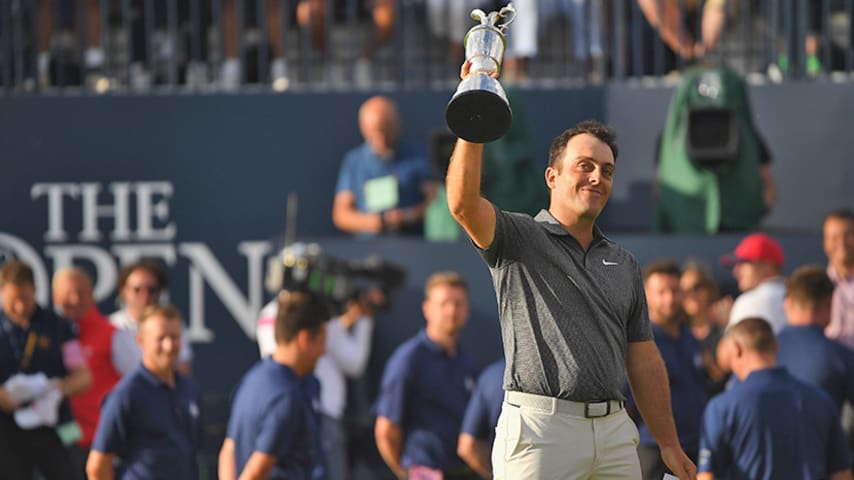
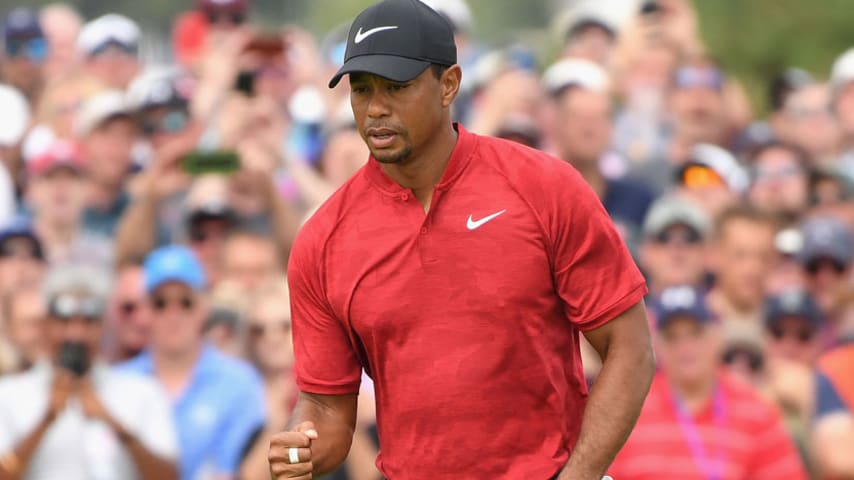
Tiger Woods is currently T6 after an even-par 71 in the final round of The Open Championship at Carnoustie. He went out in 34 to get into a tie for the lead as he made the turn. Woods lost steam after a double-bogey on No. 11 and a bogey on No. 12. A birdie on No. 14 brought him back within two shots of the lead but four-consecutive pars to close out his round left him three back of playing partner Francesco Molinari who finished at 8 under. This will be Woods' first top-10 in a major championship in five years.
HOLE 1 (par 4, 397 yards)
Shot 1: Iron safely down fairway into 20 mph wind
Shot 2: Using 5-iron from 176 yards, his approach is dead-on below the hole
Shot 3: Birdie putt from 15 feet loses steam, cuts across the front of the pin
Shot 4: Tap-in for par
HOLE 2 (par 4, 485 yards)
Shot 1: 316-yard drive off tee in good shape on edge of left rough
Shot 2: 7-iron from 171 yards is pin-high, finishing on the left-side collar
Shot 3: 35-foot birdie attempt never close, slides by to the left
Shot 4: Solid stroke for par
HOLE 3 (par 4, 335 yards)
Shot 1: Iron off the tee to take bunker out of play. Misses fairway and finishes in right rough
Shot 2: Approach from 128 yards with helping 18 mph wind finds green
Shot 3: Birdie attempt from 50 feet is short and left
Shot 4: Another solid par putt inside 5 feet
HOLE 4 (par 4, 420 yards)
Shot 1: Driver off the tee rolls into right edge of rough
Shot 2: 8-iron from 133 yards into the wind finds green
Shot 3: Birdie from 20 feet finds bottom of cup. Now 6 under and tied for third
HOLE 5 (par 4, 427 yards)
Shot 1: Iron off tee finishes on edge of left fairway
Shot 2: Pitching wedge from 166 lands on edge of top plateau, then dribbles back
Shot 3: Birdie attempt from 40 feet comes up short
Shot 4: Short putt for par
HOLE 6 (par 5, 582 yards)
Shot 1: Driver fading right and rolls past the fairway bunker
Shot 2: 3-wood into the wind finishes just short of the green
Shot 3: Using putter from 94 feet, his eagle attempt is well-read but too aggressive
Shot 4: Rolls in birdie putt from 8 feet; now just two strokes off the lead
HOLE 7 (par 4, 403 yards)
Shot 1: Iron off the tee safely in fairway
Shot 2: 7-iron from 155 yards finds green
Shot 3: Birdie attempt from 30 feet fades to left
Shot 4: Tap-in for par
HOLE 8 (par 3, 195 yards)
Shot 1: 7-iron finds greenside bunker
Shot 2: Blasts off to inside 5 feet
Shot 3: Short putt to save par
HOLE 9 (par 4, 476 yards)
Shot 1: Iron off the tee finds fairway
Shot 2: Tied for the lead now as he hits 7-iron approach, which finds the right greenside bunker
Shot 3: Blasts out to 6 feet
Shot 4: Par putt curls in from backside
HOLE 10 (par 4, 451 yards)
Shot 1: 3-wood doesn’t obey Tiger’s command to “bite,” ends up in fairway bunker
Shot 2: Miraculous shot with pitching wedge, easily carries Barry Burn, finishes on edge of green
Shot 3: Birdie attempt tracking well, just fades to right
Shot 4: Tap-in for par
HOLE 11 (par 4, 385 yards)
Shot 1: Iron off the tee sails right into the rough
Shot 2: Approach shot into stiff left-to-right wind hits gallery member, bounces into thick rough between greenside bunkers
Shot 3: Chip comes up short of green but misses bunker and dribbles back
Shot 4: Putt from off green to save par rolls well past
Shot 5: Misses 10-footer for bogey
Shot 6: Tap-in for first double bogey of the week; now one shot off lead
HOLE 12 (par 4, 508 yards)
Shot 1: Tee shot sails into left rough
Shot 2: Second shot heads right, in rough 113 yards from pin
Shot 3: Wedge finds back left of green
Shot 4: Par putt from 30 feet comes up short
Shot 5: Makes 3-footer for bogey
HOLE 13 (par 3, 184 yards)
Shot 1: Tee shot finds edge of green
Shot 2: Birdie putt misses from long distance
Shot 3: Short putt for par
HOLE 14 (par 5, 501 yards)
Shot 1: Driver hooking left into gallery
Shot 2: Hits flier off tight lie with 9-iron; ball bounds onto green, rolls past the 4th pin on the double green
Shot 3: Using wedge on the putting surface, eagle attempt comes up well short
Shot 4: Rolls in 25-foot putt for birdie; two shots off lead after Molinari birdies
HOLE 15 (par 4, 465 yards)
Shot 1: Tee shot finishes left of greenside bunker on right side
Shot 2: 9-iron from 190 yards hits short of green, rolls down right side past pin
Shot 3: Putting from the rough, birdie attempt is on line before fading right
Shot 4: Tap-in for par
HOLE 16 (par 3, 261 yards)
Shot 1: Tee shot with helping wind finds green
Shot 2: 60-foot birdie attempt finishes just left of hole
Shot 3: Tap-in par
HOLE 17 (par 4, 464 yards)
Shot 1: Driving iron finds fairway
Shot 2: Not happy with 3-iron into wind from 234 yards, as he comes up short of green
Shot 3: Chip nicely played, nearly holes it
Shot 4: 4-foot putt for par
HOLE 18 (par 4, 499 yards)
Shot 1: Driver off the tee finds right rough
Shot 2: Goes right at the pin with gap wedge from 119 yards to set up a good luck at birdie
Shot 3: Putt curls in front of the hole
Shot 4: Taps in for par